Specific Instructions for filling up
the online application form
(Integrated Ph D Programme)
Step 1: Register
with your e-mail address and password to start the online application process.
Registration
form for IISC Online Application
1. Name of the candidate: Enter you name as it appears in your
degree certificate.
2. Password: Choose password of your choice.
3. Date of Birth: Enter your date of birth as it
appears in your degree certificate.
4. Email Address: Enter your e-mail address.
5. Security
Question: Select any
one security question: “What is your mother’s maiden name” for your password
retrieval purpose.
6. Security Answer: Enter the answer for the question you
have chosen above
When you submit the registration form, you will
receive an e-mail asking you to verify your e-mail address by clicking on a
link.
After the e-mail address is
verified, your registration is complete.
Step 2: Log in to the website to fill the
application form. You will need information about / from the following
documents, so have them handy.
·
Certificate / Mark sheets of:
10th Std, 12th Std, UG Degree and/or PG Degree.
·
Your e-mail address.
·
Demand draft for the amount of
the application fee (Rs 600 for GN & Rs.300 for SC/ST/PH candidates).
·
Your passport size photograph (to
be uploaded).
·
A scanned image of your signature
(to be uploaded)
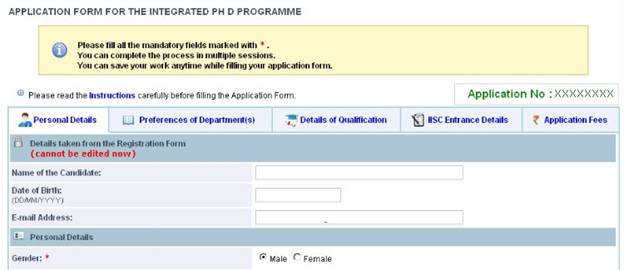
The Application Form is divided into five parts, each appearing inside a
separate tab (see the screenshot below)
·
You have to fill all the details (especially mandatory fields) within a
given tab, click on “Save & Proceed” button to proceed to the next tab.
·
Unless you fill the mandatory
fields in a tab you will not be allowed to move to the next tab.
·
On clicking the “Save &
Proceed” button, if the browser does not take you to the next tab, it means some
mandatory fields have not been filled (correctly), if this happens look for error messages which are displayed in red.
·
Detailed instructions for the
fields in each tab are given below.
TAB 1:
Personal Details
1. Name of the
candidate: has been
taken from your Registration form. You cannot edit/change it now.
2. Date of Birth: has been taken from your
Registration form. You cannot edit/change it now.
3. Email Address: has been taken from your
Registration form. You cannot edit/change it now.
4. Gender: Choose your
gender by clicking any of the radio buttons.
5. Nationality: Choose your nationality by clicking
any of the radio buttons.
6. State of
domicile: will
appear if you are Indian. Select state of domicile in the dropdown menu.
7. Country: will appear if you are non Indian.
Select the country in the dropdown menu.
8. Category: chose your category by clicking on
the appropriate radio button.
9. OBC -
Sub-Classification: will appear if you choose other backward class. Again
select from one of those radio buttons.
10.Sub category: choose one from the radio button.
11.Father/guardian’s
name: Please enter the name of your father/guardian in the text box.
12.Relationship: choose the
relationship of the person mentioned in Item 17 from the dropdown menu.
13.Mother’s name: Please enter your mother’s name in
the text box.
14.Family
background: use the dropdown menus to provide details about the
educational qualification, Occupation and Annual income of your Father/Guardian
and Mother.
1. Contact Details: Provide your contact
details by filling the text boxes and making the choice from the dropdown menu
for ‘State’.
15.Are you currently
employed: Please select from the radio buttons, if you click
“yes”, please provide Name of the company, Designation, office address and
experience.
16.Passport size
photograph: Click on the space provided and upload your
photograph in jpeg, gif, tiff, png formats (Note: it should not exceed 1 Mb).
17.Scanned image of your signature:
same as above.
|
Note: On clicking the “Save & Proceed” button, if the browser
does not take you to the next tab, it means some mandatory fields have not
been filled (correctly), if this happens look for error messages which are
displayed in red. |
TAB 2: Preference of Departments
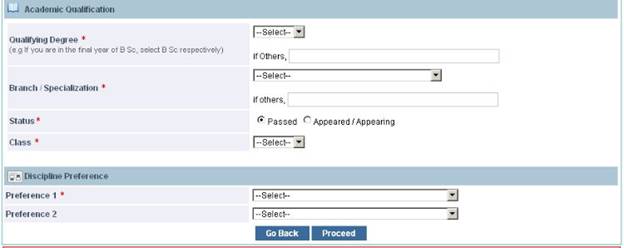
1. Qualifying
Degree: Select your Qualifying
degree from the drop-down menu.
(Note: Qualifications like M Sc, one year diploma, or ME /M Tech etc.,
are not in our eligible qualifications therefore avoid entering them.)
2. Branch/Specialization: Select your
branch in your qualifying degree from the drop-down menu. If you have studied
branch in:
·
Any
of the biological science fields like biology, microbiology, zoology, genetics
you may select “Biological Sciences”
as your branch.
·
Any
of the chemical science fields like organic chemistry, applied chemistry,
inorganic chemistry you may select “Chemical
Sciences” as your branch.
·
Any
of the physical science fields like applied physics, radio physics, geophysics
you may select “Physical Sciences”
as your branch.
·
Any of the mathematical science fields like
applied mathematics, statistics you may select “Mathematical Sciences” as your branch.
|
Note: Please note that based on the
particulars filled in the columns 1 and 2 (Degree and Branch), list of
department you are eligible will be listed in the preferences columns. |
3. Status: choose
appropriate status from the radio buttons.
4. Class: choose the
class from the dropdown menu (if your university does not announce the class
leave it blank)
5.
Preferences of Departments: Give
your choices by selecting from the dropdown menu. If applying to only
one department, leave the remaining columns blank.
TAB
3: Details of qualification

In this tab
you will provide details of marks/grades you obtained in examinations: 10th Std*, 12th Std*, and Undergraduate*.
Each of
these exam is to be selected from the dropdown menu in item 1, for example you
choose 10th std from the dropdown menu: after entering all the details, you
press the “SAVE” button. In the side bar entitles “Entry Status” you will see a
green (tick mark) against 10th Std.
Now select
the next exam under item 1 and fill the details.
The right
side bar entitled “Entry Status”
(see the picture) provides visual feedback to you about the details of what you
have filled.
1. Qualification: choose from
the dropdown menu, 10th and 12th std , Undergraduate or Post-Graduate
2. SSLC/10th
Standard: Select the year of
passing from the popup menu. Fill in the school name and place;
select the board you studied from
the popup menu. Enter the aggregate
percentage of marks and the main
subjects you studied.
3. II PUC/12th
Standard: Same as above.
4. Undergraduate:
a.
Degree: Select your degree you are studying
or completed. If your degree is not listed in the dropdown, choose “others” and specify below.
b.
Branch / Specialization: Select your branch / Specialization.
If your branch is not listed in the dropdown, choose “others” and specify below.
c.
Year of passing: Select from
the drop down menu.
d.
Fill in the institution/college
name and place.
e.
University: Select from the drop down menu. If
not listed in the dropdown, choose “others”
and specify below.
f.
List Key Subjects: Fill the key subjects you have
studied separated by comma. (Max 250 characters).
g.
Rank: Fill if you have any.
h.
Class: Choose the class from the dropdown
menu (if your university does not announce the class, leave it blank.
i.
Semester-wise Marks:
i.
Percentage / GPA: Select appropriately. If GPA, then
specify “out of”
ii.
Enter the percentage of marks obtained
semester wise in the semester columns if in semester pattern OR otherwise if you are under annual pattern fill the marks of 1st ,2nd 3rd
and 4th year in the 2nd, 4th, 6th, 8th semester columns for 1st,2nd,3rd,4th
year marks respectively. If you are in the final year and do not have the marks
of the 7th and 8th semester, fill in up to the 6th semester and leave the other
columns blank.
j.
If you qualified in any one of the following degree, after filling up all
the above details, and on clicking “Save” button, you will get next screen
where you have to give the details of your BSc degree.
i.
B Sc followed by AMAeSI
ii.
B Sc followed by AMIE
iii.
B Sc followed by AMIIChE
iv.
B Sc followed by AMIIM
v.
B Sc followed by AMIMechE(I)
vi.
B Sc followed by Grad IETE
|
Note: Your Undergraduate degree must match with the 'Qualifying
Degree' that you entered in 'Preference of Department(s)' page. |
TAB
4: IISC Entrance Details
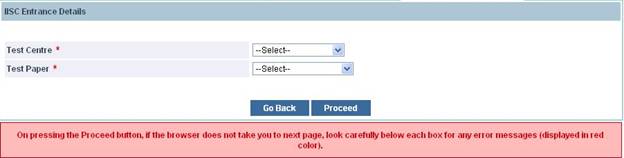
In this TAB kindly provide the “Test Centre” and “Test
paper” which you would prefer to take up pertaining to IISc Entrance Test.
TAB
4: Application Fees
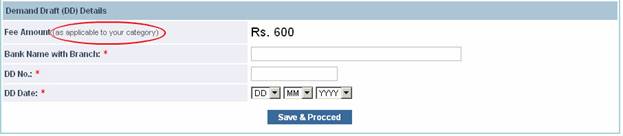
1. Fee Amount: Will display automatically as per
your category.
2. Bank Name with
Branch: Enter the bank name with branch on which you have
drawn the Demand Draft.
3. DD No: Enter
the DD Number.
4. DD Date: Enter the DD
Date.
When you complete the
application form you will see the following screen,
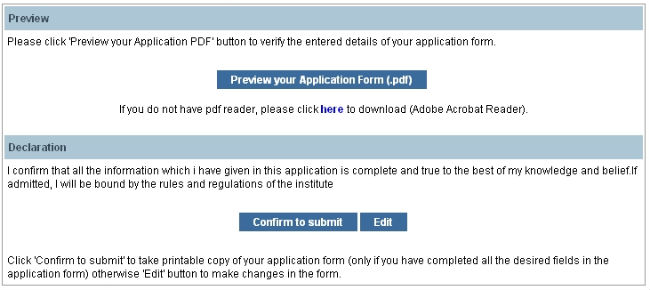
Please
preview your application for by clicking the ‘Preview your Application form’ button.
On clicking
the “Preview your Application form”
button you will get a PDF of
preview copy of your Application form, go through it carefully to verify all the details, if you find any
errors go back to the online Application form by clicking ‘EDIT’ button and correct them. Preview this version again; to
ensure all the corrections have been incorporated.
Repeat this
process until your Application form is completely and correctly filled.
Be careful
you” CANNOT “edit/change the
application form (except for entrance test details etc) after you SUBMIT the application form.
After
satisfying yourself about the correctness of the application form, press “CONFIRM TO SUBMIT” Button.
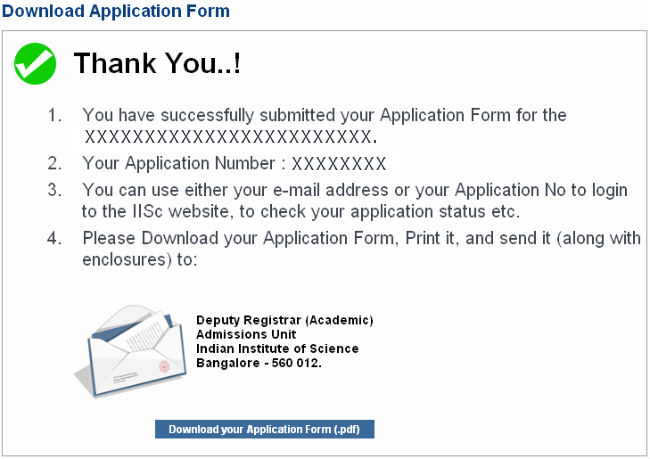
This will
give you the PDF of your application form, store it carefully
1.
For
your records
2.
Send
it to the “Deputy Registrar (Academic),
Admissions unit, Indian Institute of Science, Bangalore -560 012.” on or
before 21 Mar 2011 along with the
documents mentioned in check list (the first page of this pdf contains the instructions to be followed)
3.
Admit Card: Admit card for IISc Entrance Test,
will be printed along with application form.
You must retain the same with you and produce it at the time of Entrance
Test at the Centre where you are going to write the test.